TIG Welding a Go-Kart Gas Tank
Print Article
Tom Patsis
Owner, Cold Hard Art
Share
Metal artist Tom Patsis is back to teach you how to build a gas tank for a go-kart with a TIG welder.
Welding with aluminum
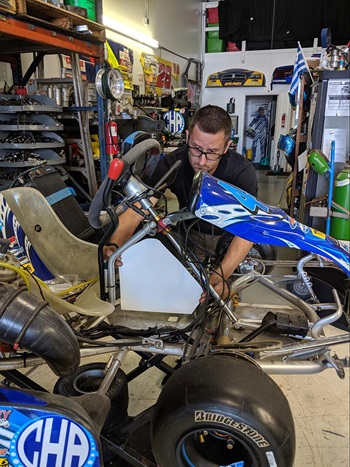
Hello and welcome back! Today I’m going to walk you through how to build a gas tank for a go-kart! For this project, you will need a poster board, quarter sheet of .065-inch 6063 aluminum, 8 inches of a 1/8-inch thick, 2-by-2-inch aluminum angle, a TIG welder (I used my Miller® Dynasty® 280 DX TIG welder) and a bung of your choosing.
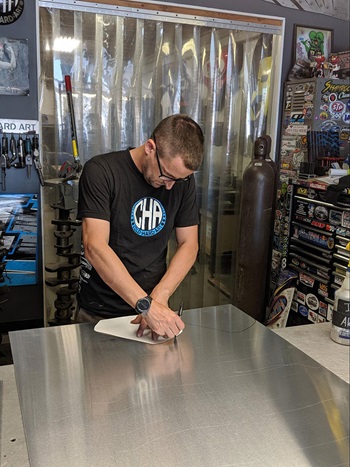
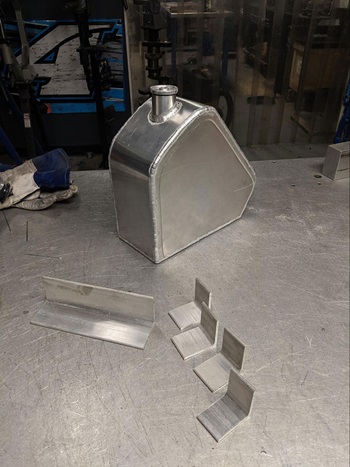
To start, decide where you want your tank to be positioned on your kart, then draw and cut your side profile templates from the poster board.
Take your template designs to your work area, lay them on the sheet of aluminum and trace them on the material.
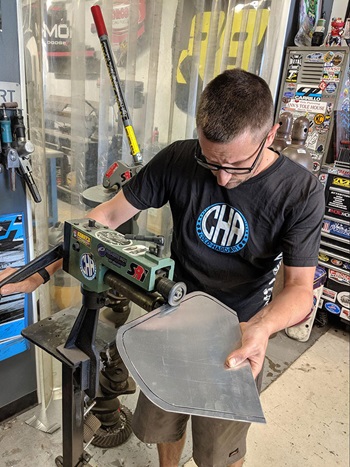
Next, cut off the excess material on a stomp shear to make it more manageable. Then, use a throatless shear and trim out your pieces on the lines that you drew earlier.

Draw your lines on the pieces you just cut for bead rolling. I drew my line 3/8 of an inch from the edge on all sides but the bottom. You want to keep the bottom a flat surface for the mounting brackets, which will be added later.

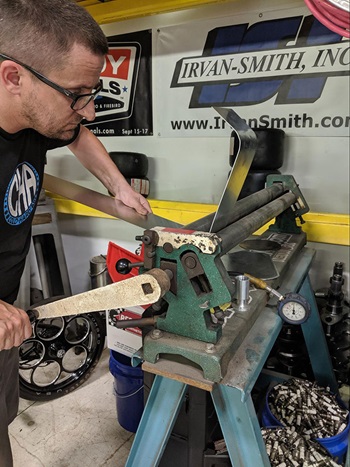
Now, roll out the lines you drew using a bead roller with a step die. Bead rolling the edges makes the material stronger and provides a more varied look.
Next, I use a wooden mallet on a forming die to roll the edges over a little bit (only on the edges that are bead rolled).
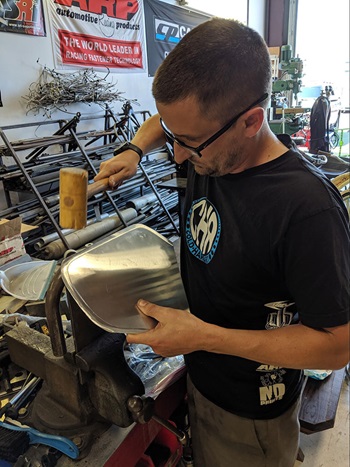
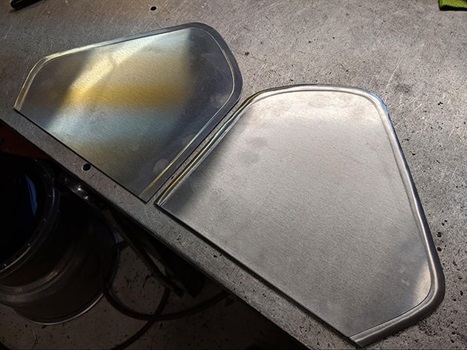
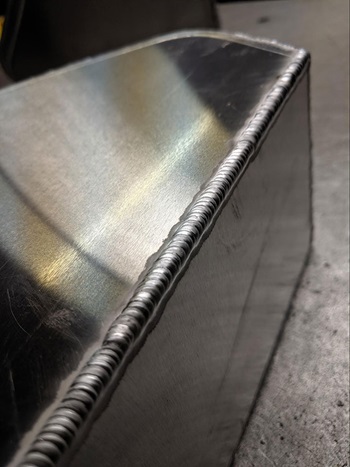
A rolled edge is not required for this project, it is your preference. Here is a comparison of a flat edge (left) versus a rolled edge (right).
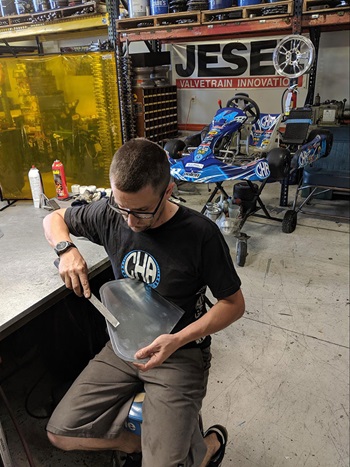
Take your sheet of aluminum and shear out a flat rectangle based on the width that you want your tank. My kart has room for a 5-inch-wide tank, so I sheared out a 5-inch-wide strip. As far as length, I sheared them double the length around the tank, so there is extra material to shear off after rolling it to fit the tank. Place the flat piece in the roller and bend it to the shape of your two side pieces.
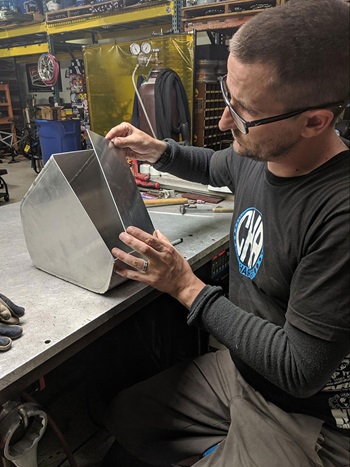
Prep the edges with a file to clean them, so they are not contaminated. Do not use a sander as that will contaminate the material.
Tack the pieces together as small and lightly as you can. You will need to go back over the welds later — and if they are too big, there will be bumps.
Next, attach the bottom piece. I don’t put the bottom piece on until after the top is all fit and in place. That way, if there are any gaps or material movement, it will be easier to adjust on the bottom.
File any high spots or bulky tack welds so you don’t have lumps in your final weld later.

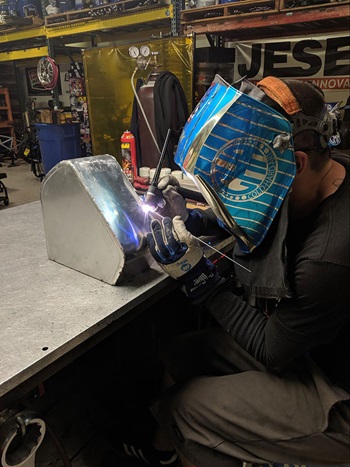
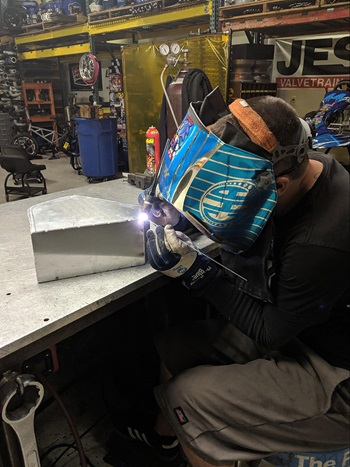
Now it’s time to start welding. When you start TIG welding the sides, weld toward yourself so you can see what you’re welding. I use a little block to rest my hand on, so I’m not shaky and can keep my weld nice. After welding for a while, your hand can get tired quickly, so this also helps with fatigue.
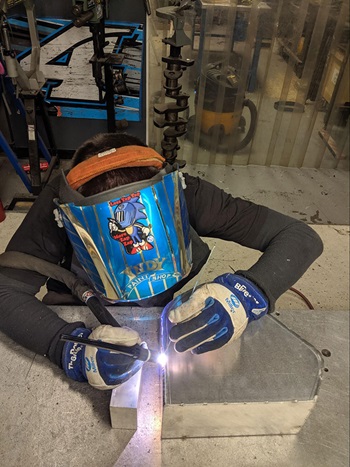
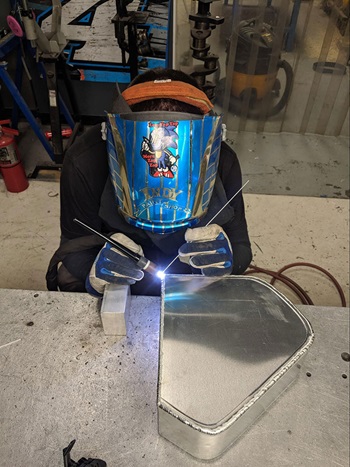
Everyone has a different preference of welding beads. But I like a lot of overlapping welds when making something that will hold fluid, because there is less chance of leaking.
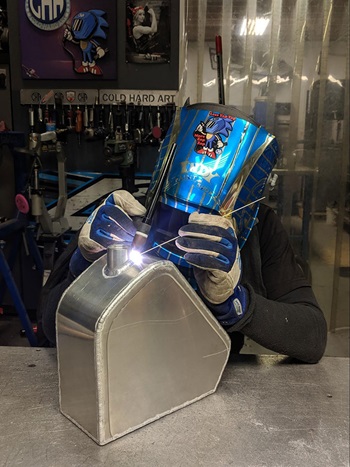
It may sound strange, but I do not put the hole in the material until after I weld the bung in place. By doing that, it keeps the material from wrinkling. So, place your bung where you want it, and weld it into place.
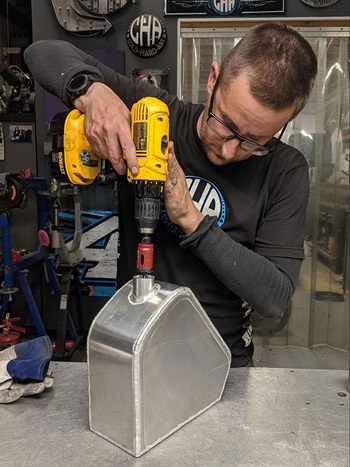
Next, I used a hole saw that will fit inside the thread and cut the proper size hole. Afterward, you can use your file to clean up the edges.
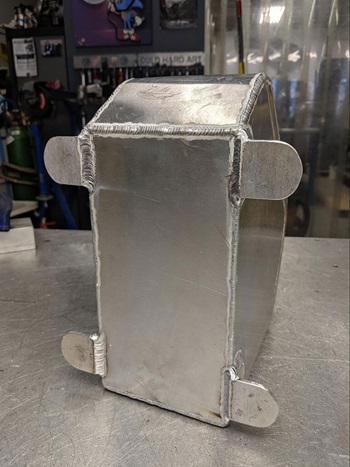
You can make your four mount brackets with a piece of 2-by-2-inch aluminum angle. I cut them out in 1 1/2-inch-long pieces. Then round the edges of each piece on one end so that you can make one continuous weld.
Make sure you know where to place your mounting brackets, then mark and lightly grind the weld off where each bracket will be placed. I placed my brackets to space the gas tank up 1/4 inch, to provide a slight gap and avoid damaging the tank if the cart floor is damaged.
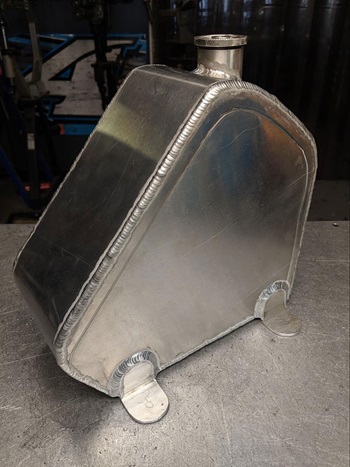
When welding anything that will contain fluid, be sure to weld up any openings that might become leaks. In this case, weld all the way around each bracket.
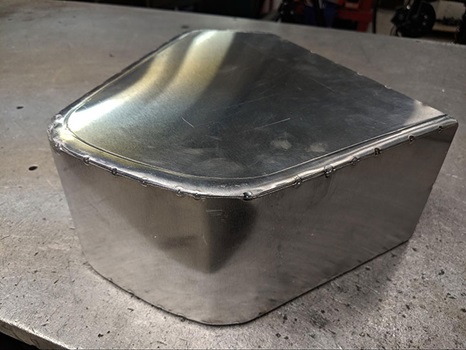
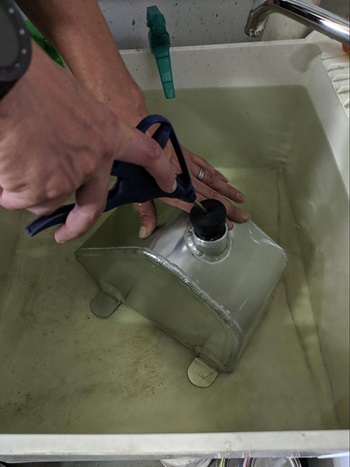
This last step — leak checking your tank — will save you from a lot of embarrassment. One of the easiest ways is by fully submerging your tank in water and applying very little psi (maybe 1-3 psi). It will not take much to show if you have a leak. After successfully passing this test, you now have a custom long-lasting gas tank for you kart!
Feeling inspired? Check out our project page for more DIY welding projects, including step-by-step guidance, videos and downloadable plans.
CHECK IT OUT