Article
Choosing What Filler Metal To Use for DIY Welding Projects
No matter the welding process or material, here are six questions to help determine what filler metal to use for your home welding projects.

There are many factors that contribute to creating a sound weld. Understanding the importance of joint design is one of the crucial factors in producing good-quality welds.
Proper joint design is based on design specifications outlined in various welding codes or standards used when welding professionally. The joint design determines what type of weld the operator will need to produce to meet the acceptable quality standard. A few examples include T-joints, which require a fillet weld; butt joints requiring a groove weld; lap joints, which require fillet welds; and corner joints, which can be fillet or groove welds.
The American Welding Society recognizes five primary welding joint types. Each joint has its own purpose and characteristics, which influence how the pieces fit together and the best approach to welding.
The five basic joint types are:
Most welding projects use at least one of the five welding joint types.
Explore their benefits and applications — understanding each welding joint type is
an important part of becoming an experienced, successful welder.
This joint type joins two workpieces in the same plane with their edges meeting or with a root opening lying parallel to one another. Welders often use butt joints to join plate, pipe, tubing or any other application where a smooth, flush weld face is desired. Welding projects using this design can include an exhaust system on a car or joining panels for a door.
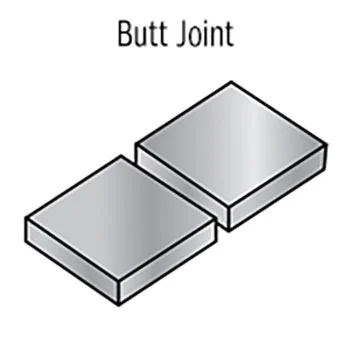
Butt joints have good mechanical strength when fitted and welded properly.
They can be designed in several ways:
Flat edges (square groove): When preparing the workpieces for a butt joint, the meeting edges may require no edge preparation. This creates a square joint design when fitted, referred to as a square groove.
Beveled edges (V-groove or single bevel): The edges can be partially beveled or completely beveled throughout the material thickness. Edge preparations usually require a specific bevel angle. You may need to prep one or both workpieces, creating what is known as a V-groove or single bevel.
With or without a gap (root opening): The edges can touch, or they can be spaced to a specific tolerance to create a root opening.
With or without backing: Butt joints may be welded with backing, usually referred to as a backing bar or backing strip, or without backing material, which is called an open root.
The material thickness or application helps determine if the edges of a butt joint should be left square or beveled. Beveled edges often create a stronger weld but are more time-consuming and require more weld deposit. Welders use square grooves on thinner materials where edge preparations are not possible, such as sheet metal or any material less than 1/8-inch thick.
Tip #1: Determine whether edge preparation is required or if a square groove joint design is sufficient.
Tip #2: Decide whether a root opening is needed or if the workpieces can be welded without one.
Tip #3: Ensure proper fit-up of the workpieces to reduce welding issues and improve consistency.
When pieces are joined at 90 degrees and take the shape of an L, they form a corner joint. These joints are easy to assemble and require little, if any, edge preparation. Corner joints are often used for projects that require a square frame, such as fabricating a weld table.
Proper fit-up is important. If your project requires a 90-degree angle, ensure the pieces are square and account for potential distortion during welding. Heat input can cause the angle to shift depending on how the joint is prepared. Using a jig or fixture to hold the parts in place is one effective way to maintain alignment and minimize distortion.
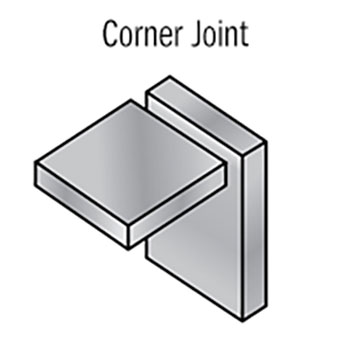
The two types of corner joints are open corner and closed corner. In a closed corner joint, the edge of one piece lies flush against the edge of another. An open corner joint is when two edges meet at their corners and there’s an opening where you can see the thickness of each metal.
Choosing between an open and closed corner joint often comes down to material thickness and the strength required for the application.
With open corner joints, you may need to increase travel speeds when welding thinner materials to prevent burn-through. Open corner joints create a V shape and may require more weld deposit.
If you’re welding a closed corner joint, you can grind the weld face to create a smooth transition from the weld to the base material.
Tip #1: Increase travel speeds on thinner materials with open corner joints to prevent burn-through.
Tip #2: Ensure proper fit-up to meet required angular dimensions and reduce distortion.
An edge joint is formed when the edges of a workpiece are parallel or nearly parallel to one another. These joints are typically used when the parts will not experience significant load or impact. Avoid using an edge joint if one or both pieces will be subjected to heavy stress.
While edge joints and corner joints share similarities, their placement differs. Corner joints are typically on the outside of the workpieces, while edge joints sit along the inside edge. Choosing between the two often comes down to the application, the type of structure you’re building and the material thickness.
Edge joints may require post-weld grinding to bring the weld flush with the base material if aesthetics are important.
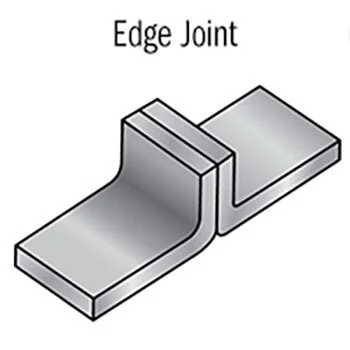
There are different types of edge joints depending on how you prepare the edges. These preparations improve the weldment by allowing adequate penetration or improving overall weld coverage when welding an edge joint.
You can also weld all sides of an edge joint for additional rigidity.
Square groove: Edges are left flat and welded as-is.
V-groove: One or both edges are beveled to help achieve deeper penetration on thicker materials.
J-groove: One edge curves inward while the other remains flat, creating a J shape that uses less weld metal than a V-groove.
U-groove: Both edges curve inward to create a U shape, commonly used for welding thick materials.
Tip #1: Only use edge joints only in applications that won’t be subjected to impact or heavy stress.
Tip #2: Use a groove edge preparation to allow adequate penetration or improve the overall weld joint rigidity.
Tip #3: Weld an edge joint on all four sides of the joint for added reinforcement.
A lap joint is formed when the surfaces of the two pieces overlap one another. The weld is deposited in the joint where the two intersect. A lap joint exhibits good mechanical properties, especially when you weld both sides of the overlapped pieces, which provides extra reinforcement.
Lap joints are very common for joining plates or sheet metal, such as when you’re adding flooring to a vehicle or patching a hole.
When welding a lap joint, two of the largest factors to success are overlap and preventing gaps:
Overlap: Determine the amount of overlap needed in the joint by the thickness of the two workpieces. The thicker the material, the more overlap needed.
Preventing gaps: It’s important to make sure there are no gaps between the two workpieces. You want them to be as flush as possible. When welding a lap joint on thinner materials like sheet metal, reduce your amperage and use a faster travel speed to avoid distortion and burn-through.
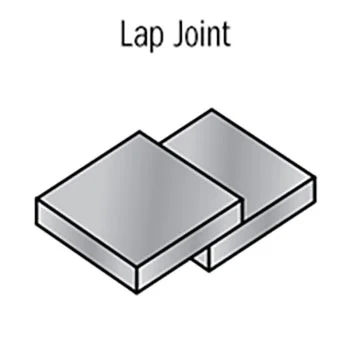
When choosing between a butt joint or a lap joint, consider that a butt joint will result in a more flush contour, leaving the workpieces in the same plane. Lap joints can provide more strength in higher-stressed areas, but the joints are more noticeable and do not result in a flush contour.
Tip #1: Weld both sides of the overlapped workpieces for additional rigidity.
Tip #2: Use more of an overlap between the two pieces when welding thicker materials.
Tip #3: Before welding, make sure the two pieces are as flush as possible.
A T-joint is created when the edges of your two workpieces meet at approximately 90 degrees and take the shape of a T. You'll weld the edge of one workpiece to the flat surface of another. T-joints possess good mechanical strength, especially when welded from both sides. You'll find these joints in many fabrication applications, including structural steel, tubing and equipment applications.
T-joints are the most common joint design in all applications. You can weld them fairly easily in the flat, horizontal, vertical or overhead position, while other joint designs can be more difficult to weld out of position.
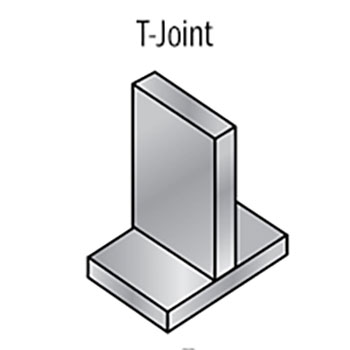
When welding a T-joint, several factors influence the quality and consistency of the weld.
Below are important considerations to keep in mind:
Preparation: T-joints generally require little or no joint preparation and are easily welded when the correct parameters and techniques are used. You can leave the edges of the joint unaltered, or you can prep them by cutting, machining or grinding.
Weld on the side experiencing stress: Place the weld on the same side of the joint that will be subject to any type of stress. Impact or load from the opposite side of the joint could cause the weld to fail.
Weld both sides when stress is applied from both directions or to achieve maximum strength.
Work angle: When welding a T-joint with a 90-degree angle, it’s best to split the difference using a 45-degree work angle to ensure you will achieve proper penetration on both workpieces.
Position: T-joints are the most common joint design in all applications. You can weld them fairly easily in the flat, horizontal, vertical or overhead position, while other joint designs can be more difficult to weld out of position.
Uneven thickness: If you’re welding dissimilar metal thicknesses using a T-joint, focus more of your weld onto the thicker piece of material.
Tip #1: Weld the joint from both sides to improve strength.
Tip #2: Place the weld on the same side of the joint that is subject to stress.
Tip #3: Use a 45-degree work angle to ensure proper penetration on both workpieces.
Posted May 8, 2024
No matter the welding process or material, here are six questions to help determine what filler metal to use for your home welding projects.
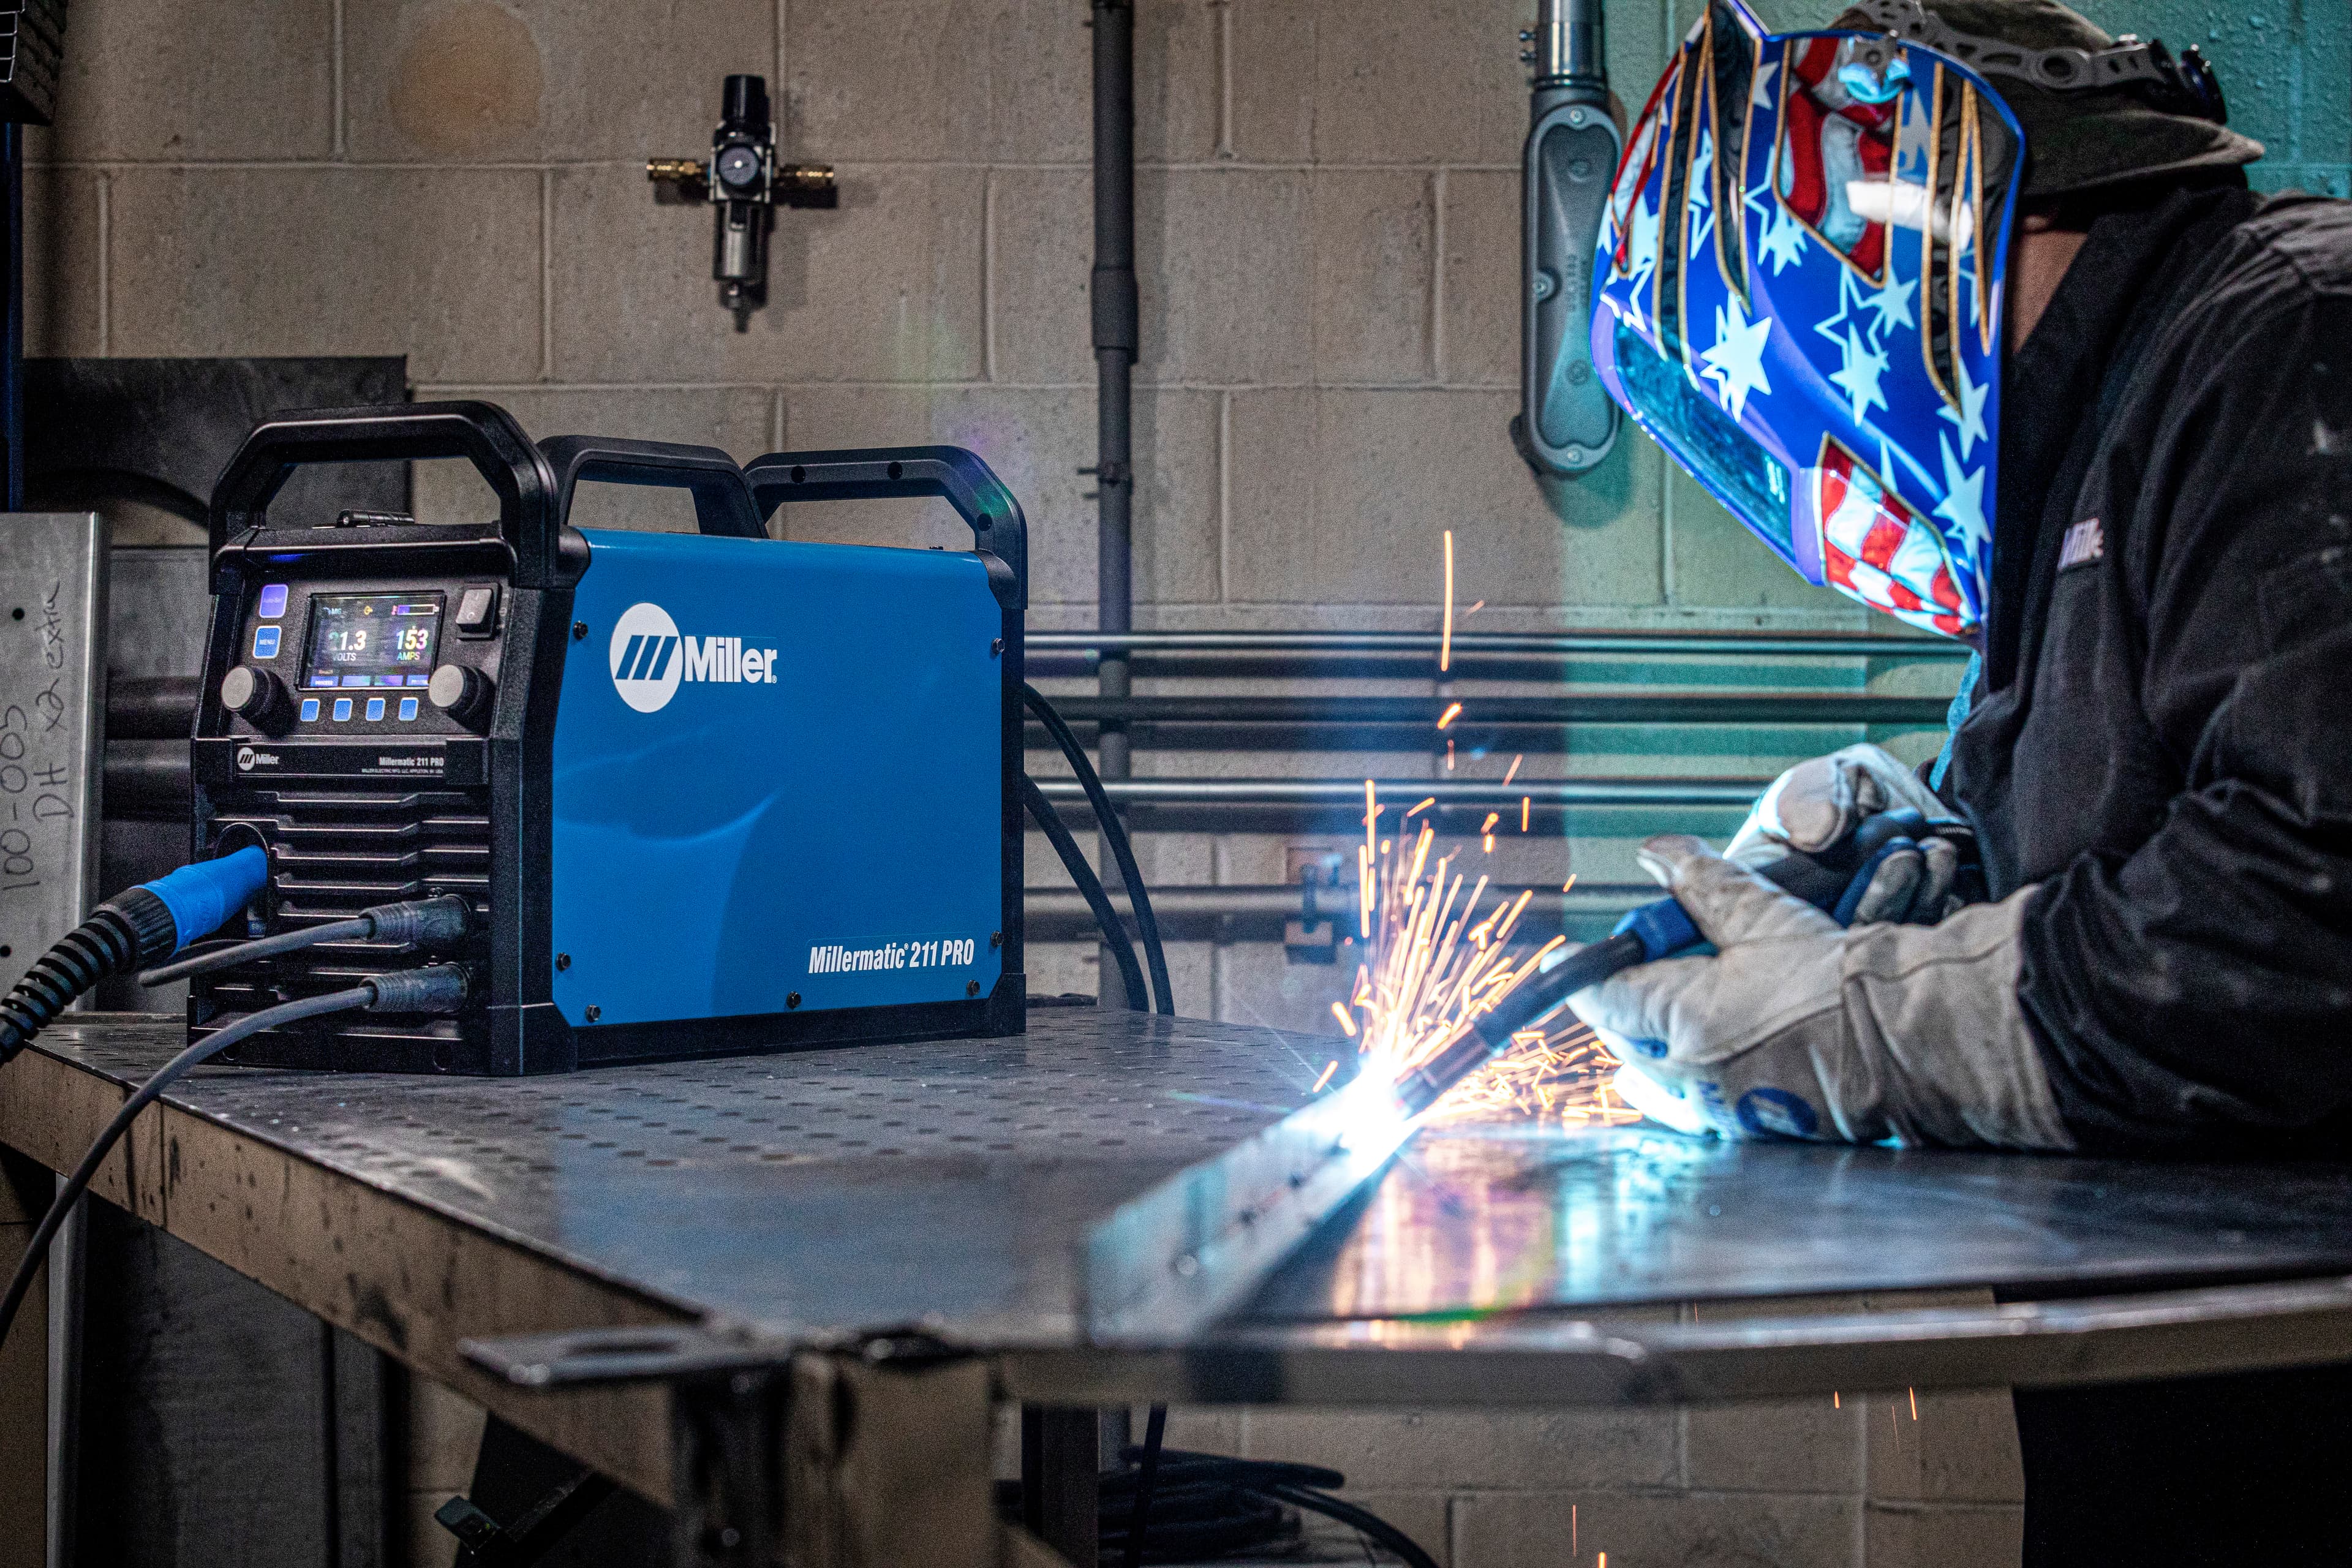
Learn about duty cycle in welding, its importance, and how it impacts your workflow. Ensure optimal performance and safety with the right duty cycle.
Regular welder maintenance will keep your machine performing in top shape. Follow these guidelines for common welder maintenance tips.