Article
How to Set Up a Welding Space in Your Garage or Shop
From shop layout to must-have equipment, learn how you can create your own welding space.
Ron Covell
Owner, Covell Creative Metalworking
Welding auto body sheet metal can be particularly challenging due to its thinness, especially for welders who are more accustomed to welding thicker materials. Welding almost always causes some distortion because the metal in and around the weld shrinks as it cools, which causes warping. Thin metal welding is particularly prone to distortion, but the good news is that there are effective methods to mitigate this issue that we will detail in this article.
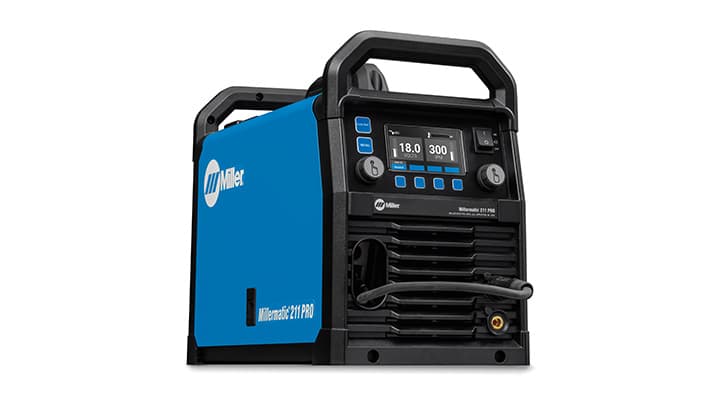
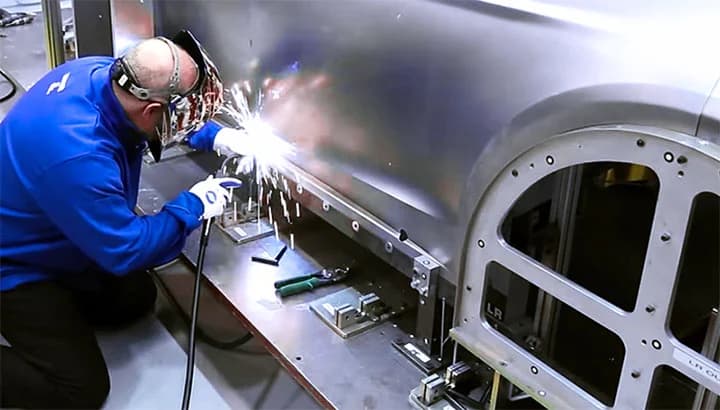
In modern collision repair, panel replacement is typically the norm. However, for older vehicles, welding is often necessary during repair, restoration or custom modifications. For MIG welding auto repair, the Millermatic® 211 PRO is an excellent choice due to its ultra-fast, repeatable, precision arc-starting characteristics. With a higher duty cycle and 15-foot MIG gun, it is capable of welding longer and covering more area without moving the machine.
Vintage vehicles often have rust damage, which is usually found on the lower edges of panels where water tends to collect. While aftermarket repair panels are available for many popular vintage car restorations, they may not always be an option. In such cases, patch panels can be fabricated using standard metalworking techniques. This project will demonstrate how to weld a patch panel onto a vintage fender using MIG and TIG welding.


Step 1
Cut away damaged metal
The first step is cutting away the damaged metal, then overlapping and clamping the new patch to the old fender, making sure it is accurately positioned.

Step 2
Scribe and trim
With the patch panel clamped in place, a scriber is used to mark the old fender for trimming. After scribing, the patch is unclamped and the fender is trimmed precisely on the scribed line in preparation for making a butt weld at the joint. Butt welds are preferred for this kind of work, since an overlapped seam can trap moisture that may lead to more rust damage in the future. It’s also much easier to straighten the metal after welding if everything is kept the same thickness.
Step 3
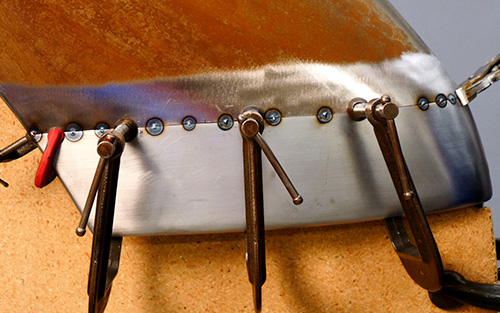
Clamp and tack weld
After trimming, the panel is carefully clamped into place to check the fit. The better the fit-up, the better the weld, so it’s good practice to make any adjustments necessary to get the best fit possible. Once clamped, the panels are tack welded together, spacing the tacks no more than 1 inch apart. Professional welders will appreciate the precision of the Millermatic 211 PRO when welding thin sheet metal with MIG.
Step 4
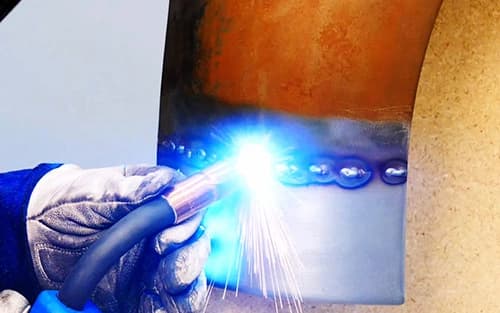
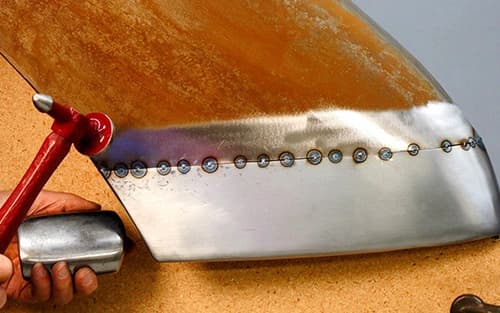
Stitch weld
After the first tacks are in place, the clamps are removed. If anything is out of alignment, the joint can be worked lightly with a hammer and dolly to ensure that the seam is flush; then the joint can be slowly stitched shut. The key to minimizing distortion is to add very short bursts of weld, essentially adding a new tack at the end of each previous tack weld. Allow the panel to cool completely before adding more welds.
The amount of wire stickout from the gun affects the weld temperature — more stickout results in a cooler weld and vice versa. I keep the stickout around 1/2 inch. My goal is to make quick hot weld tacks. Auto-Set™ on the Millermatic 211 PRO puts me where I need to be without too much fine tuning.
Step 5
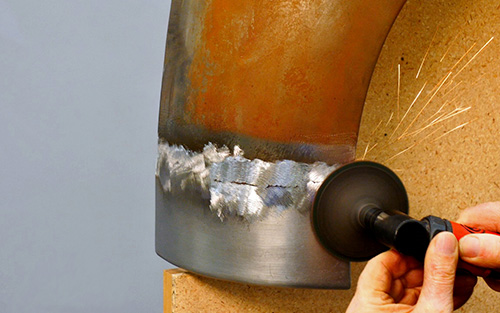
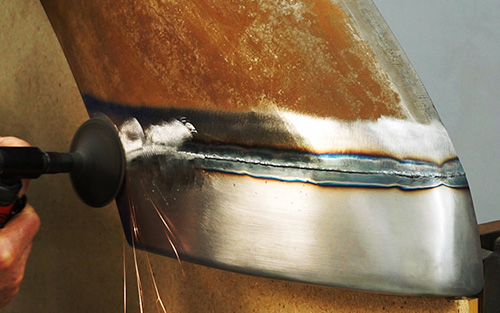
Grind the welds
With the panels fully stitched together, remove the bulk of the weld with a disc grinder. I’m using a 3-inch diameter 36-grit disc. It’s important to prevent the panel from becoming overheated at this stage, since the heat from grinding can also cause distortion.

Step 6
Smooth and adjust
After you remove the majority of the weld, any low spots can be raised with careful hammer and dolly work, and then the entire area is sanded with a 50-grit disc on the grinder. Last, the panels can be smoothed with an orbital sander using 120-grit paper.
Step 7
TIG welding the rear patch
We’ll use TIG welding for the rear patch. The first steps are identical to the front — overlapping, adjusting and clamping the patch panel into place, scribing the edge, and then trimming and adjusting the panel to get a nice, tight fit. Then the patch is clamped into place and tack welded. Use a Syncrowave®️ 212 TIG welder, using about 45-50 amps regulated with the foot control, DC electrode negative, flowing 20 cfh of pure argon. I did not use pulsing for this job. The torch is fitted with a gas lens and a #8 cup, and I’m using a 1/16-inch diameter, 2% ceriated or lanthanated tungsten electrode, sharpened to a fine point at a 30-50-degree included angle. The tungsten stickout is 1/8-1/4 inch, and the filler wire is 0.035-inch diameter ER 70 S-6.
Step 8
Finish welding the rear patch
With the tack welding completed, the clamps are removed. It’s good practice to work the entire joint with a hammer and dolly to make sure the metal is completely flush before doing the finishing weld. On a curved panel like this, weld in a single pass from one end to the other. For completely flat panels, distortion can be minimized by welding in smaller segments — about 1 inch at a time — and skipping to different parts of the joint to keep the heat down.
One benefit of TIG welding is that the weld bead can be kept very small, ideally no more than 1-1/2 times the material thickness, and the welds are soft enough to work with a hammer and dolly. This allows you to smooth out any distortion the welding may have caused.
Step 9
Final sanding and adjustments
After welding, the beads can be sanded flush and any final tune-ups can be made. Use hammering on-dolly to raise any low spots that may be present. Finish with an orbital sander to smooth the surface.
Final
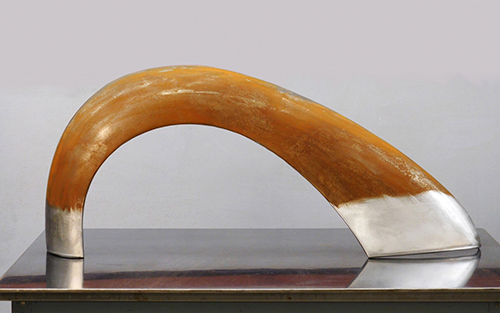
Here is the fender with both patch panels completed. If necessary, a little plastic filler can be used to fill any imperfections; then the fender is ready for priming and painting. A properly done repair like this should last decades.
From shop layout to must-have equipment, learn how you can create your own welding space.
Learn why MIG, pulsed MIG, TIG and pulsed TIG are the ideal choices when welding sheet metal.
From shop layout to must-have equipment, learn how you can create your own welding space