Understanding the Basics of MIG Welding for Mild Steel
What is MIG welding?
MIG welding, or metal inert gas welding, is an arc welding process in which a continuous solid wire electrode is fed through a welding gun and into the weld pool to join two base materials together. A shielding gas is also sent through the welding gun and protects the weld pool from contamination. The technical name for it is gas metal arc welding (GMAW), also known as wire welding.
Why choose MIG welding?
The MIG process enables the home hobbyist, artist, farmer/rancher, motorsports enthusiast and even professional welders to make most types of fabrication and maintenance/repair welds on material from 24-gauge up to 1/2-inch thick. In addition to flexibility, many people turn to MIG welding because they've heard that it's an easy process to learn. With some basic guidance, most people can quickly become proficient in MIG welding.
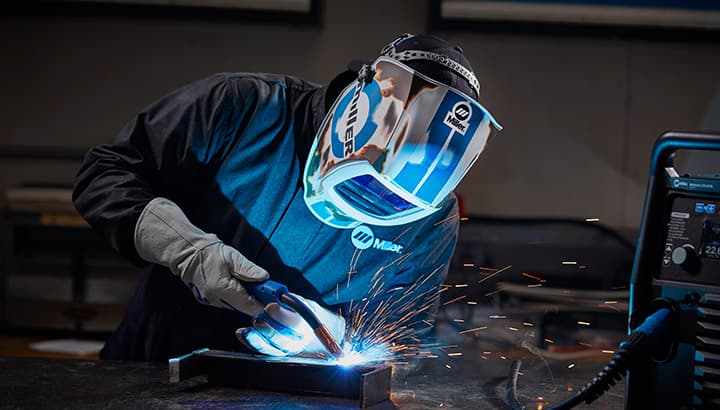
Ensure proper safety and apparel before starting
Before tackling any welding project, make sure you have the proper safety apparel or proper protective equipment (PPE) and that any potential fire hazards are removed from the welding area. Basic PPE includes leather shoes or boots, cuffless full-length pants, a flame-resistant and long-sleeve jacket, leather gloves, a welding helmet, safety glasses and a bandana or skull cap to protect the top of your head from sparks and spatter.
Miller offers a wide range of safety accessories for everyone, from the occasional hobbyist to the full-time professional welder. Refer to your owner’s manual for additional information about safety apparel and precautions.
Setting up your MIG welder: Mild Steel
Prepare your metal: Unlike stick and flux-cored electrodes, which have higher amounts of special additives, the solid MIG wire does not combat rust, dirt, oil or other contaminants very well. Use a metal brush or grinder and clean down to bare metal before striking an arc. Make sure your work clamp connects to clean metal, too. Any electrical impedance will affect wire feeding performance.
Bevel the joint: To produce strong welds on thicker metal, bevel the joint to ensure the weld fully penetrates to the base metal. This is especially important for butt joints.
Check your cables: Before striking an arc, check your welding equipment to make sure all of the cable connections are tight and free of fraying or other damage. 4 Select electrode polarity: MIG welding requires DC electrode positive, or reverse polarity. The polarity connections are usually found on the inside of the machine.
Set gas flow: Turn on the shielding gas and set the flow rate to 20 to 25 cubic feet per hour. If you suspect leaks in your gas hose, apply a soapy water solution and look for bubbles. If you spot a leak, discard the hose and install a new one.
Check tension: Too much or too little tension on either the drive rolls or the wire spool hub can lead to poor wire feeding performance. Adjust according to your owner's manual.
Inspect consumables: Remove excess spatter from contact tubes, replace worn contact tips and liners and discard the wire if it appears rusty.
Choosing the right wire: Mild Steel
For steel, there are two common wire types. Use an AWS classification ER70S-3 for all-purpose welding. Use ER70S-6 wire when more deoxidizers are needed for welding on dirty or rusty steel. As for wire diameter, .030-inch diameter makes a good all-around choice for welding a wide range of metal thicknesses in home and motorsports applications. For welding thinner material, use a .023-inch wire to reduce heat input. For welding thicker material at higher total heat levels, use .035 inch (or .045-inch wire if it is within your welder's output range).
Best shielding gas for MIG welding mild steel
There are a couple of shielding gas options for MIG welding gas, depending on your application and needs:
75% Argon / 25% Carbon Dioxide Blend (also called 75/25 or C-25): The best all-purpose shielding gas for carbon steel, C-25 produces the least amount of spatter, best bead appearance and won't promote burn-through on thinner metals.
100% CO2: This option provides deeper penetration but also increases spatter, and the bead will be rougher than with C-25.
Voltage and wire speed settings
Voltage and wire speed depend on numerous variables, including metal thicknesses, type of metal, joint configuration, welding position, shielding gas and wire diameter speed (among others).
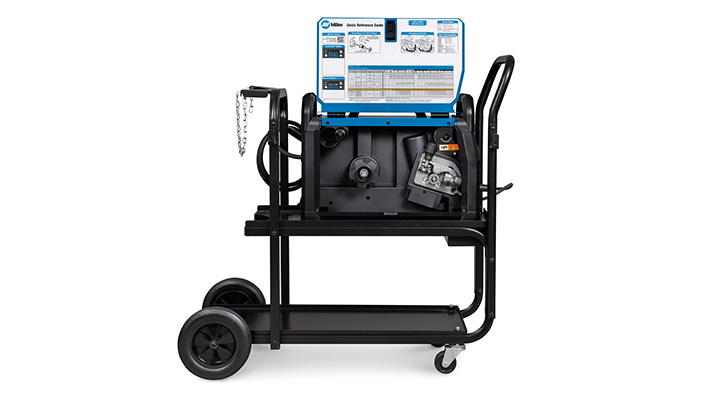
Miller provides two tools to simplify setting proper voltage and wire speed:
1. A convenient reference chart, located on the inside of the door housing the wire feed system.
2. Miller® Auto-Set™ technology, which is a feature on Millermatic and Multimatic models, like to Millermatic 211 PRO. Using either method will get you in the ballpark. From there, you can fine-tune the welding arc to your personal preferences. For more detail on setting your parameters, check out this article.
Best practices for MIG welding mild steel
- Wire stick-out: Stickout is the length of unmelted electrode extending from the tip of the contact tube and it does not include arc length. Generally, maintain a stickout of 3/8 inch and listen for a sizzling bacon sound. If the arc sounds irregular, one culprit could be that your stickout is too long, which is an extremely common error.
- Push vs. pull:
- Pull technique: With the drag or backhand technique (also called the pull or trailing technique), the welding gun is pointed back at the weld puddle and dragged away from the deposited metal. Dragging typically produces deeper penetration and a narrower bead with more buildup.
- Push technique: The push or forehand technique involves pushing the gun away from (ahead of) the weld puddle. Pushing usually produces lower penetration and a wider, flatter bead because the arc force is directed away from the weld puddle. In addition, pushing usually offers a better view and enables you to better direct wire into the joint.
- Travel angle: Travel angle is defined as the angle relative to the gun in a perpendicular position. Normal welding conditions in all positions call for a travel angle of 5 to 15 degrees. Travel angles beyond 20 to 25 degrees can lead to more spatter, less penetration and general arc instability.
- Work angle: Work angle is the gun position relative to the angle of the welding joint, and it varies with each welding position and joint configuration (see below).
Welding positions
When it comes to MIG welding, understanding the different welding positions is crucial for achieving strong, high-quality welds. Each position requires specific techniques and adjustments to ensure the best results. The main welding positions include flat, horizontal, vertical and overhead; each position has unique challenges and requires different angles, motions and settings to accommodate the effects of gravity and the characteristics of the weld joint.
Flat position
Butt weld (a 180-degree joint): Hold the gun at a 90-degree angle to the workpiece, directing the filler metal straight into the joint (but don't forget to include your travel angle of 5 to 15 degrees). A small, back-and-forth motion with the gun can help fill a large gap or when making multiple passes. A slight pausing at the side of a weave bead can help avoid undercut.
T-joint (a 90-degree joint the type of weld on this joint is called a fillet weld): Keep the gun at a 45-degree angle, or equal distance from each piece. When making multiple weld passes, the work angles change slightly. This helps avoid uneven weld beads and undercuts.
Lap joint (also a fillet weld): Angle the gun between 60 and 70 degrees. The thicker the metal being welded, the greater the angle.
Horizontal position
Because of the effects of gravity, the gun work angle must be dropped slightly by 0 to 15 degrees. Without changing the work angle, the filler metal may sag or roll over on the bottom side of the weld joint. The travel angle, whether using a push or a drag technique, generally remains the same as for a weld joint in the flat position.
When making multi-pass welds on thick metal, or to bridge a slight gap where fit-up is poor, weave beads may be used to fill a weld joint. A slight hesitation at the top toe of the weld helps prevent undercut and ensure proper tie-in of the weld to the base metal.
Voltage and amperage settings for welding in the horizontal position are usually the same or slightly less than settings for welding in the flat position.
Vertical position
Vertical MIG welding, both up and down, can be difficult. This makes pre-weld setup very important for making high quality welds. Since you are fighting gravity, consider reducing the voltage and amperage by 10 to 15 percent from the settings for the same weld in the flat position.
The vertical down technique helps when welding thin metals because the arc penetrates less due to the faster travel speed. Because vertical down welding helps avoid excessive melt-through, welders sometimes place very thin materials in the vertical position even if they can weld them in the flat position. When welding vertical down, begin at the top of a joint and weld down. For thin metal where burn-through is a concern, direct the wire away from the weld puddle. Keep the electrode wire on the leading edge of the weld puddle. A very slight weave may help flatten the weld crown.
With the vertical up technique, begin at the bottom of a joint and weld up. This can provide better penetration on thicker materials (typically 1/4 inch or more). The travel angle of the gun is a 5 to 15 degree drop from the perpendicular position. A slight weaving motion can help control the size, shape and cooling effects of the weld puddle.
Overhead position
Drag, push or perpendicular gun techniques can be used for MIG welding overhead. But because of gravity, travel speeds must be fast enough that the weld metal does not fall out of the joint. Also, for this same reason, weave beads should not be too wide. Lowering the voltage and amperage can help keep the weld puddle small and more controllable, which is why you might want to consider using a smaller diameter wire.
Practice, practice, practice
Note that travel speed — the rate at which you move the gun along the joint — influences the shape and quality of a weld bead to a significant degree. Experienced MIG welders often determine the correct travel speed by judging the weld puddle size in relation to the joint thickness. Knowing that a weld bead needs to be no larger than the thinnest section of metal being welded, adjustments to travel speed are made accordingly. The arc is kept on the leading edge of the puddle, ensuring the molten metal doesn’t get ahead.
Most people can create good-looking, high-quality MIG welds with a combination of practice and following the techniques discussed.